Just a snapshot of the frames and keel in approximate position. We are looking from stern to bow. The bow and three more frames will be added. The frames themselves will be trimmed further; the pieces have just been bonded and are still rough.
Every time I build a boat, I learn something and get ideas on how the process could be improved. Now I am starting on a new design. I am getting comfortable with using custom solid lumber planking with no plywood. By breaking the sheathing process into fairly narrow planking, we can create surfaces unrestricted to curvature in only one direction at a point. This should result in a more rounded surface shape.
Current plans are for a boat about 13 1/2 feet long and 46 1/2 inches wide with a somewhat wineglass shaped, squared off stern. The sheathing will be 1/4 inch by 2-inch cross section, solid wood planking. I have an entire table of dimensions and have drawn full-size patterns for the frames, stem, and keel. In fact, the wood keel is ready to accept frames. My wood source was low on inventory; thus, I had to scarf a short piece unto the keel stock to get the length needed. (Another foot added to its length would be more spacious and preferable for many uses.)

Back to making progress. I am currently installing the sheer; once that area is re-enforced, then I can turn the hull over and start figuring out the planking sequence. Notice that no strongback has been needed. Because everything is calculated, the frames, keel, sheer, and forefoot only go together in one position. Looking at my table of dimensions, about four hundred calculations were needed to come up with all these values. But I have been using this approach for many years, so it is quick and routine for me. Does this look like a developable surface hull design? With the plank keel, triple chine, and continuous 3D curve of the sheer, there is almost no flat surface to observe.
My first hull of this type was 14 1/2 feet long, then I did a 15-foot hull, then a 14-foot hull, and now a 13 1/2-foot hull. Each time it wasn't just the length that changed. Materials have varied, beam has changed, keel width has changed, and this hull has a squared off stern. I think that improvements have been carried about as far as I can imagine for this type of hull. Let's see if I still feel that way when the boat is completed.
Sheer has been completed; a chine strip has been installed. The hull has been turned over and the plank keel has been rabbeted to create a landing area for the first plank. Rabbeting the lengthwise center section of the keel was simple because the rabbet was cut at a constant angle on a straight edge. At the ends, the edge curves, and the angle becomes progressively steeper; an area to be careful. I used a router initially and then did touchup with a small plane. When starting to fit planks, I discovered that my 1/4" thick planks were thicker than needed, causing extra weight and decreasing their flexibility. I ran them through a planer to reduce the thickness to 6 mm.; a slight reduction but enough to make them follow the hull curvature more easily.
The hull frame was faired; board edges, initially cut at right angles, were tapered so that the hull sheathing would lay across adjacent frames with full contact. At the ends this meant using an angle grinder with a 60-grit flap disc to quickly cut away the 1 1/2' blunt edges to a tapered "V". The angle of this "V" (initially 23.2 degrees) was dictated by the designed hull projection. That projection in an X:Y:Z coordinate system is expressed by the ratio 7:3:1. A straight edge can lay across sequential frames, or ends, forming a straight line when faired. This was just the gross fairing; a more exact fairing will be done when fitting each plank.
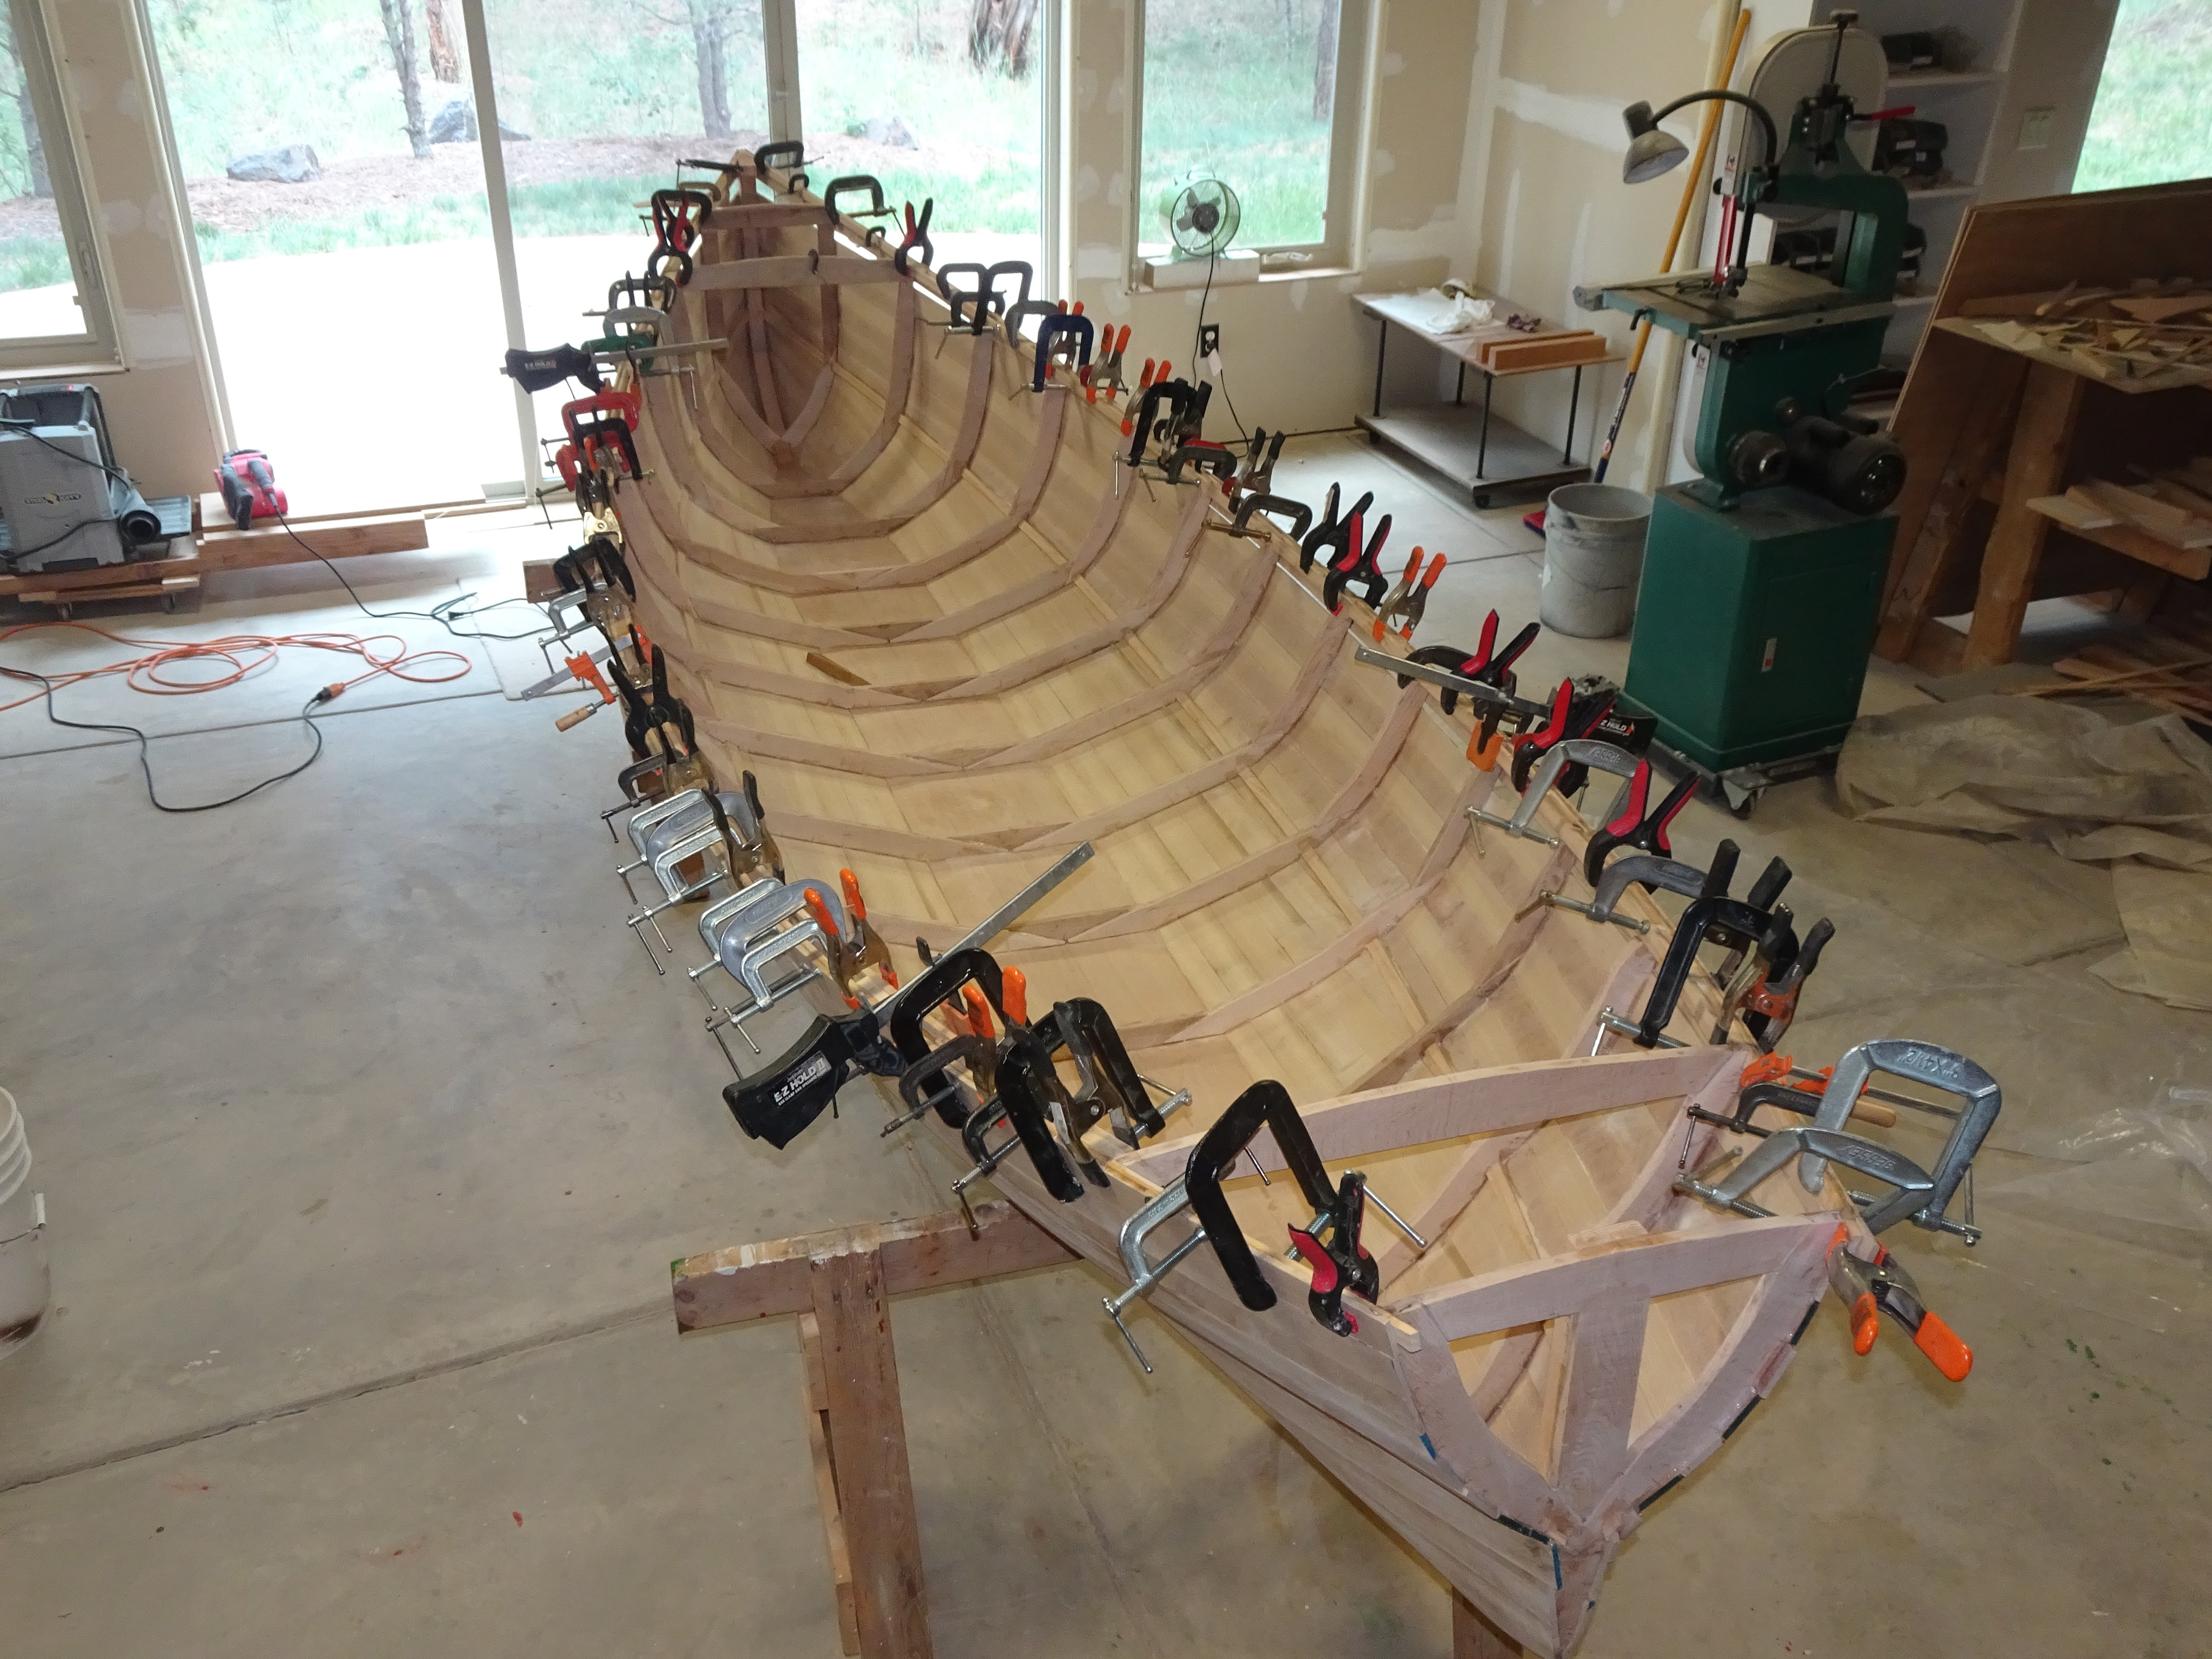
We are looking at the stern. The underwater shape of the hull will be double ended like a canoe. Two straight edges clamped in place to illustrate the ruling lines defined by the projection of length (x), width (y) and height (z) in the ratio of 7:3:1. Having a constant ratio facilitates fairing the frames and ends. Also, you can see the rabbeted plank keel. Now I am scarfing planks to achieve the full 14' needed length for this part of the hull.
The first planks, port & starboard, have been bonded into place. Planks were placed in a shallow basin to be thoroughly wetted, then they are clamped in place and "ironed" with a steamer. After being allowed to dry (easy to do in our dry Colorado climate) in place, the clamps are removed, epoxy resin is applied, and the plank is then bonded permanently with little clamping pressure required. This wetting process will not be required above that first chine as the required curvature is less severe.

I always obsess over what I could have done better. Length: this 13' 6" length is easier to haul, store, and handle but spacing the frames further to produce a longer hull would make for better performance on the water. Plank keel: I have experimented with different widths and rocker (this is the 4th hull of this type and 1 of 13 boats I have built). This keel is about 10.5" wide because I found a beautiful board of that width at the lumber store and had to try it, but I actually think about 9" would be ideal for this design. Good lumber is getting harder to find.
Does this look like a developable hull shape? All I see is beautiful fair curvature due to the increased sheer curvature, triple chine, and use of 2" wide planks. Yet, due to its mathematical design, all dimensions are accurate to 0.01" or better; more accurate than you can cut or assemble. I made two minor mistakes when measuring boards (inattentive), but there are no errors in the calculated dimensions.
Planking completed to the first chine. This surface is a single developable projection, thus, straight planks were used and only trimmed at the ends.
Planking the bottom, between the keel and first chine, was relatively straight forward. Each 2" wide plank was clamped into place and trimmed to size; then the planks were immersed in a shallow water trough for 3-4 hours until they were thoroughly soaked to increase flexibility. Next, they were clamped back in place and allowed to dry. Once dry, they were bonded into place with epoxy; minimal clamping force was needed because they were pre-warped to fit the curvature. In a few spots where clamping was not feasible, #6-3/4" screws were placed until the epoxy cured, then they were removed.
When ripping 2" thick lumber into thin planks, the resulting planks are seldom straight. What starts out as a straight plank may end up with a curve due to released stresses within the wood. Thus, I then "map out" each plank with pencil marks noting any convex or concave areas. Even if these variations are minor, they can make a significant difference when fitting a plank to the hull surface. Boat building is a game of details.
Above this chine (when the hull is upright), the planks need to curve. In order to do this, the planks must be created and fit in three sections and then scarfed in place on the hull.
Above that first chine (two more minor chines were included in the design), straight planks could no longer be used. The needed surfaces are banana shaped. Instead, each 2" wide plank was subdivided into three sections which were scarfed together to accommodate the curvature. Spiling was also required of each section prior to scarfing in place, a slow exacting task, but speed improves with practice. The amount of required curvature decreases near the sheer.

In this photo you can see that a next plank is being fitted in three sections. The forward and aft sections have been fitted. Next the midships section will be fitted and then the three parts will be scarfed and bonded together.
Compressing the hull from 14 1/2 feet to 13 1/2 feet accentuates the curvature required in the planking and increases the amount of fitting required for each plank. Just 1-2 more planks to go, but the planking must meet the sheer edge in a very finished manner.
Bonding the sheer strake in place. When using thin planking (6mm) the clamping pressure must be closely spaced. You are looking at 92 clamps of various types and sizes. What clamps I have left are either larger or much smaller. There are two scarf joints to each side. The sheer strake is full width, leaving narrow gaps at some places below it which I will fill in at the next step.


3 comments:
Hello Wayne. What news on this project?
Don, I appreciate your interest. I really like the flexibility that using narrow solid wood planks provides (instead of plywood), but the process is exacting. The 10' to 12' planks (before scarfing) are never exactly straight and with the constant curvature changes in the hull itself, each plank has to be closely fit, an iterative process, before it is ready to be bonded in place. I get about one plank, on each side, placed every few days, which is fine to me. My wife and I travel often and have other home projects (currently painting), so this boat is not a top priority.
I do want to take pride in the result; getting it right is more important than speed in completion. I want to finish the planking by late August. Then we will be gone for a while.
The boat has been complete for some time, but just recently I modified a used trailer for hauling it. Too awkward for cartopping. We recently took our two kayaks out on the trailer, and all worked well. Here in Colorado, the boating season ends soon, and we are going on a long trip. That boat may not get launched until next Spring.
It has been a busy summer: lots of mountain biking, lots of home maintenance (roof, trim, driveway), and working on the trailer and kayaks.
Post a Comment