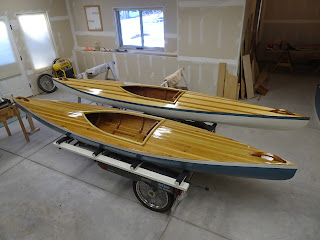
General Considerations
My goal was a nice-looking kayak for safe general use on lakes. Something better than the plastic sit-on-top hulls at the sporting goods stores, but less demanding than the long narrow high-performance kayaks. The plastic hulls are generally about 12 feet long or less and 30 inches wide or more. High performance means a hull closer to 20 inches wide. Most light duty trailer descriptions state "for hulls up to 14 feet long". This provided general parameters for my design: 12 to 14 feet long and 25-30 inches wide. Displacement is a tradeoff between length, width, and depth. Displacement at a 4-inch waterline is often used as a reference level.
The first step in design for me is to mathematically describe a midships cross section and the initial (major) chine. I chose a maximum half-width of 9 inches at the chine; curvature extending upward to the sheer would add about 4 inches to those 9 inches, resulting in a total overall beam of about 26 inches. Generally, the bow of a kayak has a finer entry angle than the stern exit angle; thus, bow and stern are calculated separately. Working with thin wooden planks, frames need to be spaced about 15 inches apart or less to provide fair curvature without unplanned deflection. I always create a table of dimensions for length using twice as many exact points as planned frames to ensure exactness. Also, the end of each calculated curve should include a short straight section with no further curvature because there is no lever to exert torque at the end point. X denotes length starting from the bow. Y denotes width starting from the midline of the hull. Z denotes height starting from the initial plank keel position.
Starting Calculations, the Major Chine
Creating fair curves is simple; most useful is the trajectory curve, also called 'parabolic'. Divide the curve into as many equal sections as you need to provide adequately spaced offsets while also considering the total offset required. In this case, I chose 9 sections (each 7 inches long) with an offset increment: 0.1 inches. At the starting point (0) the offset is 9 inches, full width amidships. At the next point (1) the offset is 0.1", reducing beam to 8.9 inches. Next point (2) has an offset reduced by 2 squared (4) for a beam of 8.6". Next point (3) has an offset reduced by 3 squared (9) increments for a beam of 8.1". At each section, the beam is further reduced by the square of the section number. At the end of the curve, the initial beam has been reduced by 0.1" multiplied by 81 for a resulting beam of 0.9". At this point, a short section without further bend is added, 0.9" width Y and 3.5" length X of straight line.
Each of those numbers are exact. This major chine is the basis for all projections above and below. Yes, there are many numbers, but this provides close-spaced points of projection so that when you 'connect the dots' when drawing frames, stem profiles, and plank keel plan view you have adequate accuracy. This is about twice the number of dimensions that I will actually use, but the additional accuracy is there if needed.The angle of this short segment can easily be calculated as twice the total offset of the curve divided by the length of the curve. For the bow section of this design, I used a total curve offset of 8.1 inches and a total curve length of 63 inches. (8.1 X 2)/63= 0.2571 (a 14.4-degree half angle). 0.9 inches divided by 0.2571 equals 3.5 inches, resulting in a total length of 66.5 inches. The initial chine curve needs to curve upward as well as in width to provide a proper bow profile. For this, the same curve length is used but with an offset increment of 0.08 inches resulting in a total offset of 7.73". The planned height, keel to sheer is 9 inches. Curved deck beams will add to the hull interior height.
For the stern section, the sequence is similar except that the exit angle, and curve leading to it does not need to be as fine. This is done by reducing the curve length (by 20%) while using the same total offset. Instead of 3.5-inch sections, 2.8-inch length sections are used. Five of these sections totals 14 inches. The frame spacing will be every 14 inches both forward and aft. Half angle at the stern will be 17.8 degrees.
Next, we start to develop the midships cross-section curvature and determine the parallel projections used to create the entire topsides.
(This entry is done in conjunction with the actual design and construction of a kayak. To be continued. I will try to add some diagrams for clarification.)


